This post may contain affiliate links. Please read my disclosure policy.

This Dutch Apple Pie has all the makings of a classic apple pie, but with a buttery, brown sugar streusel topping! Made with simple, kitchen staple ingredients, this may just become your new favorite pie recipe!
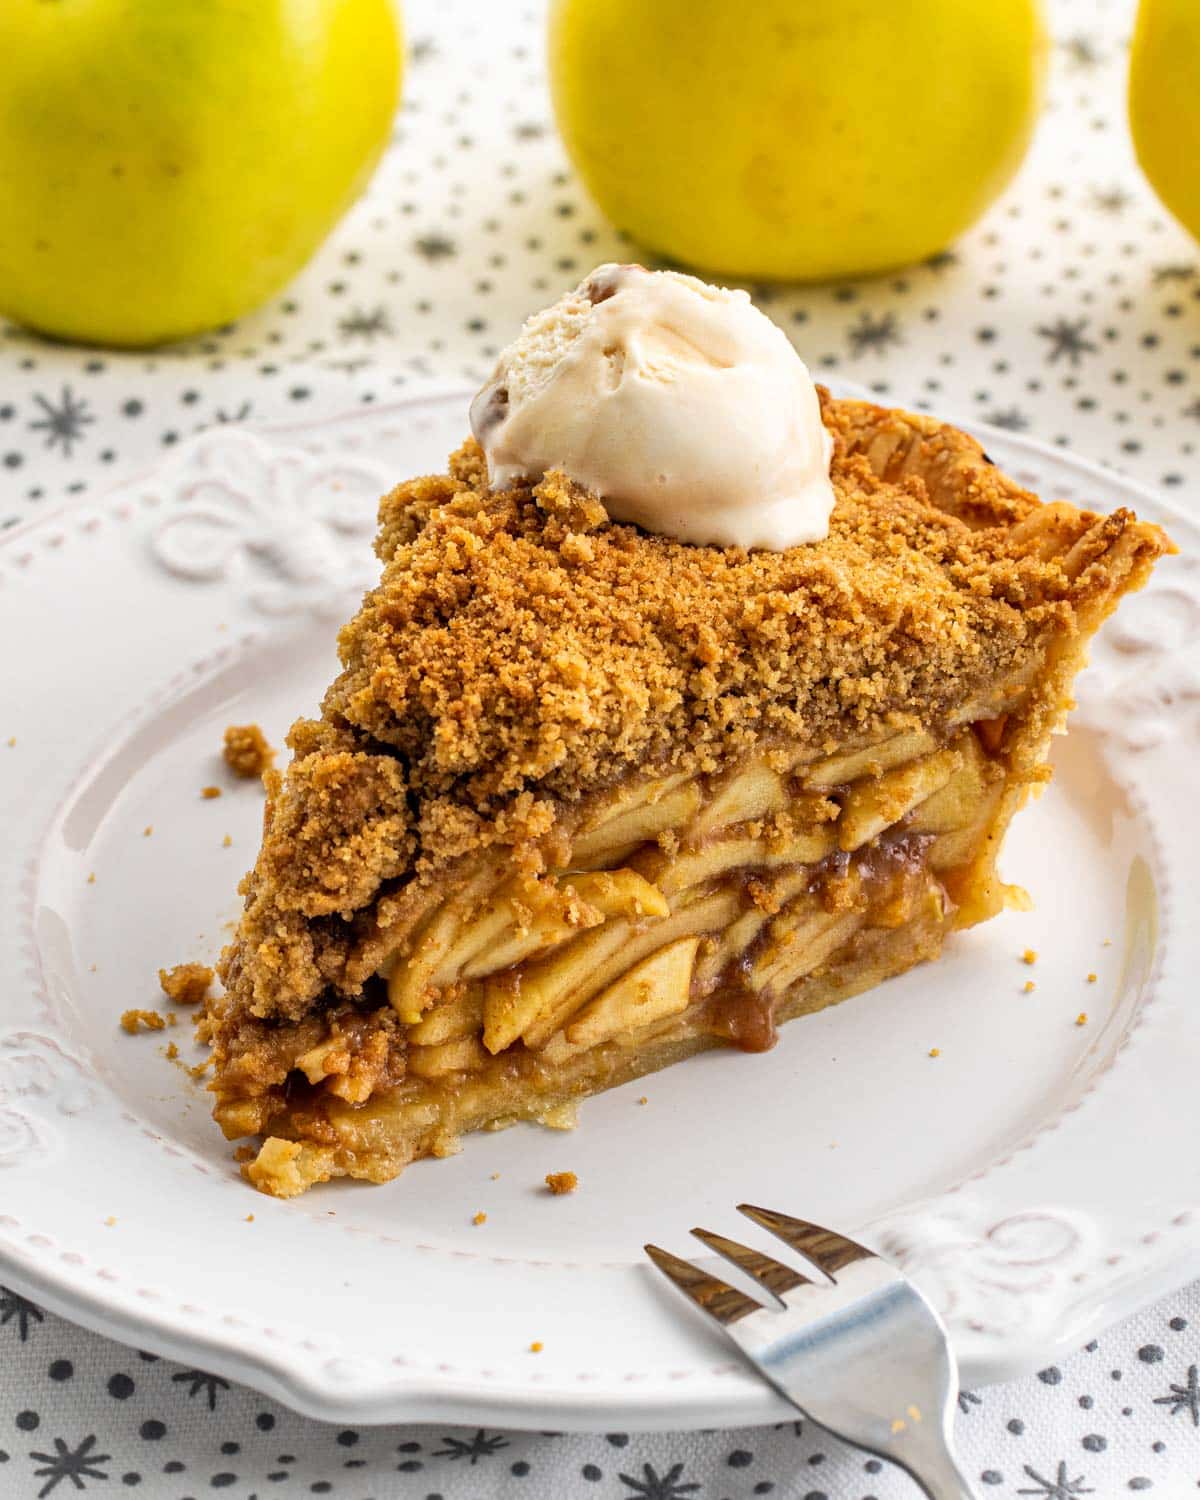
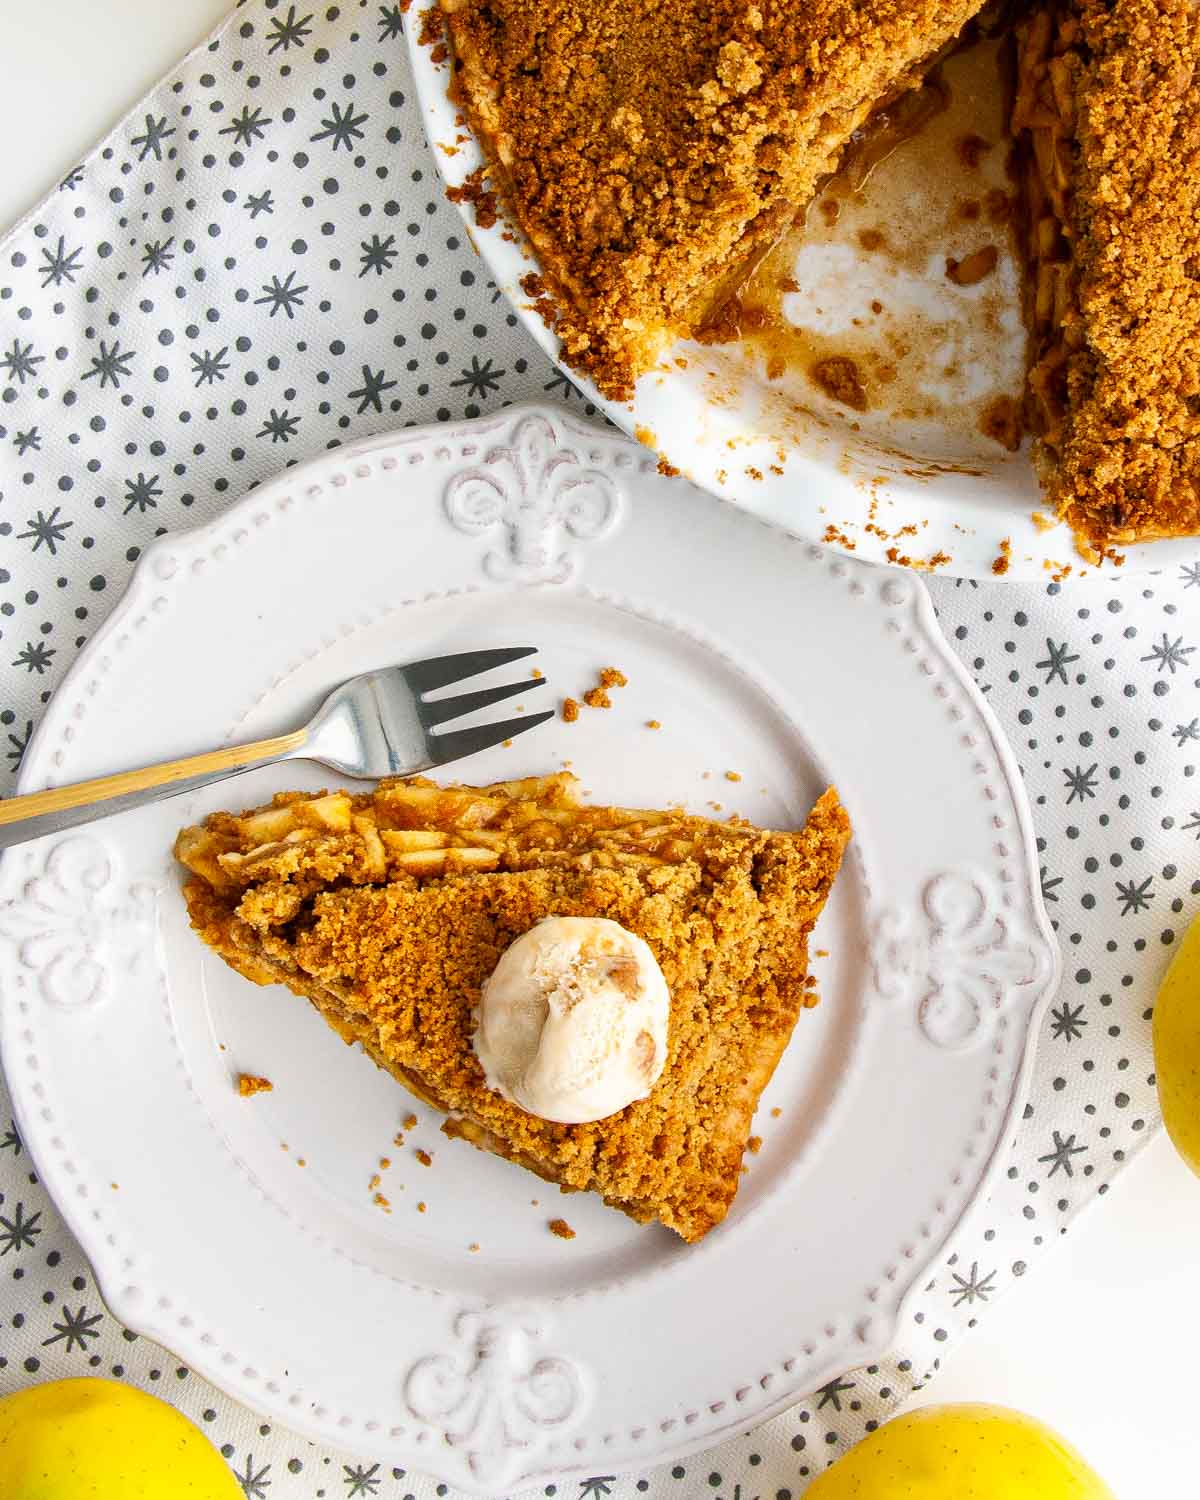
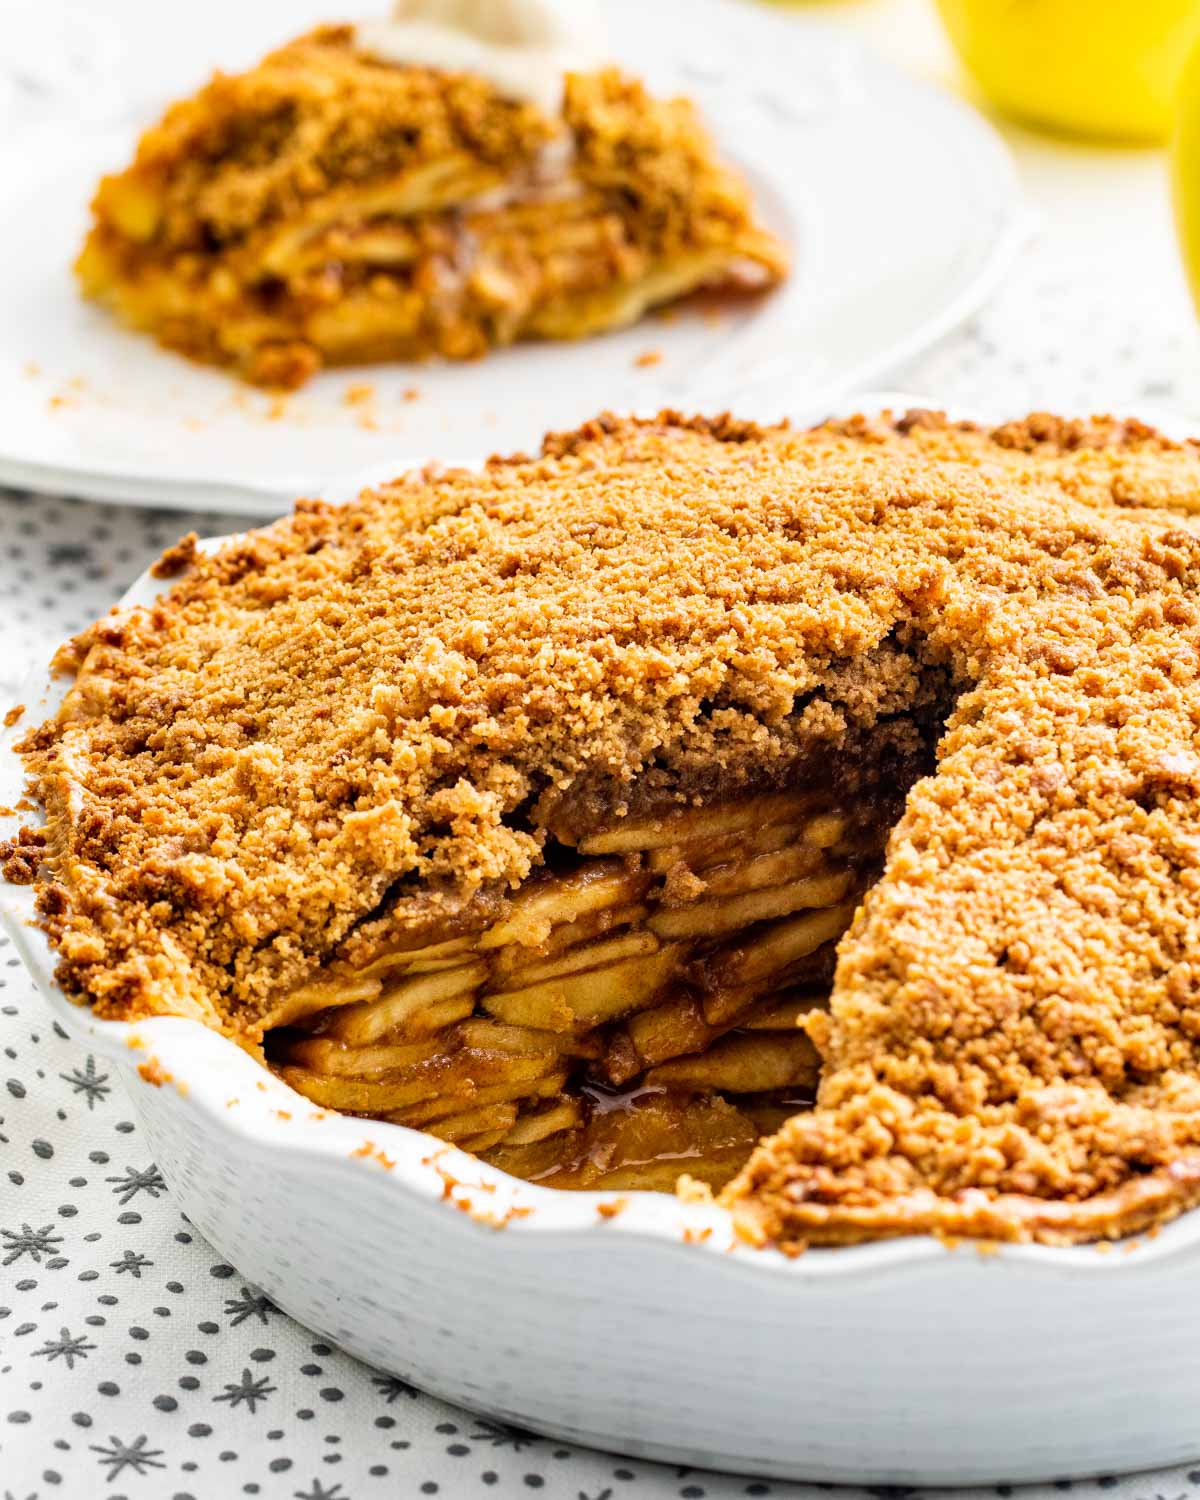
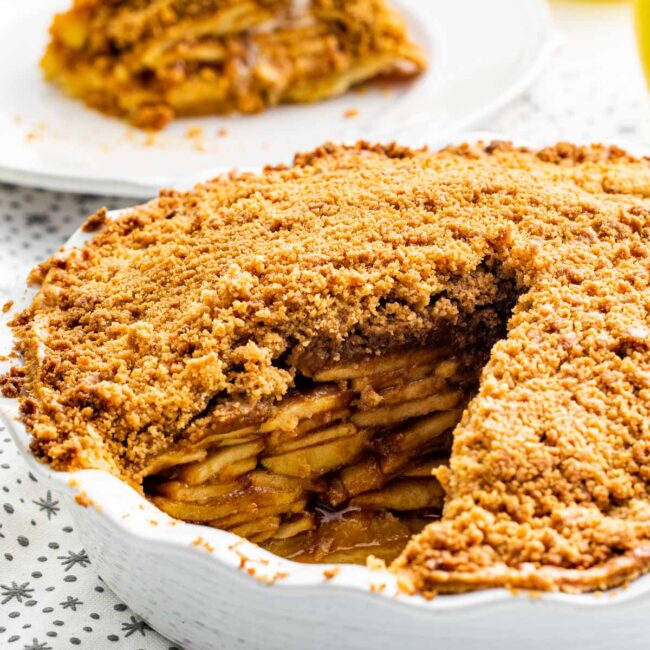
You are going to go crazy for this Dutch apple pie! Think of it as all the best parts of apple pie and apple crisp COMBINED. Made with a flaky homemade pie crust, filled with a gorgeously sweet and gooey apple pie filling, all topped with a buttery, brown sugar streusel topping. It doesn’t get much better than this.
Dutch Apple Pie
- Easy To Make
- Simple Ingredient List
- Fun Twist On A Classic
- Simply Delicious
Ok well for one, it’s a delicious pie. That should be enough to make you want to make this recipe right this second. But, if you want more, I can go on for days! This buttery, sweet, flaky, delicious dessert is so easy to make (easier than a traditional pie) plus, it’s such a fun twist on a classic.
Requiring simple ingredients you will most likely already have on hand in your pantry and fridge, this step by step recipe is a breeze! The end result? Just look at the photos! You NEED this Dutch apple pie in your life.
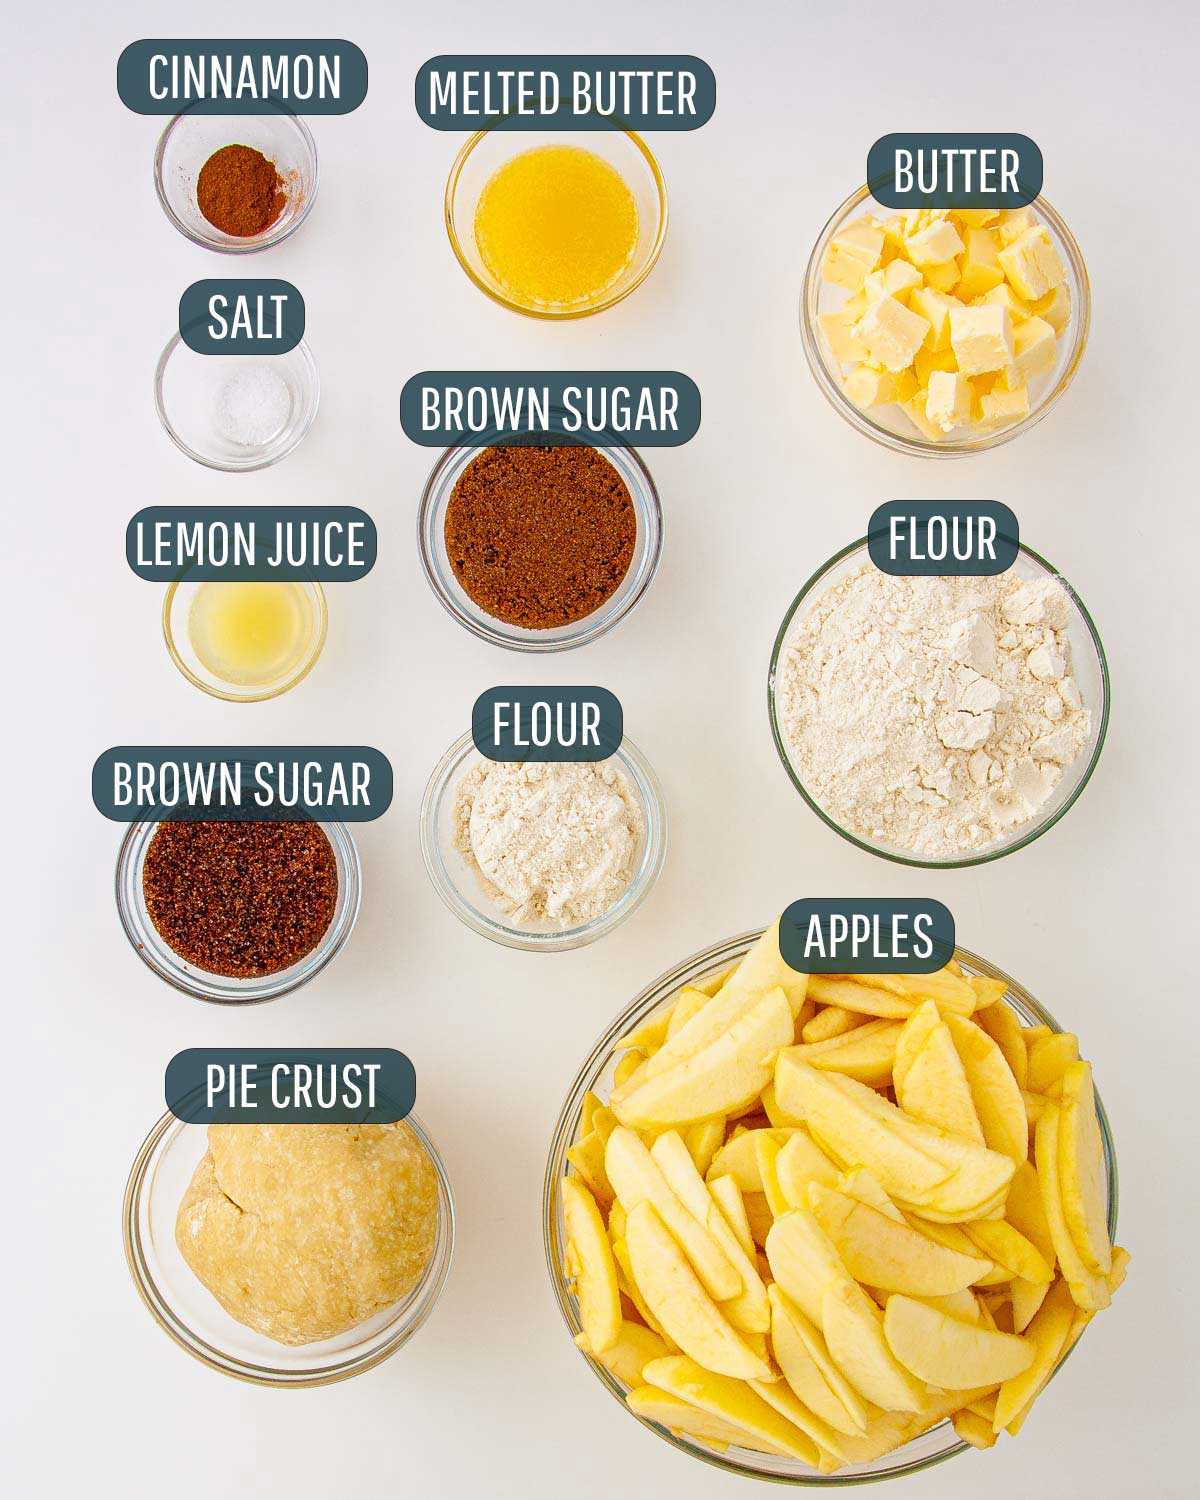
Ingredient Notes
Crust
- Pie Crust – You can use my pie crust recipe (Note: my recipe for pie crust makes 2 crusts, you only need 1) or use a store bought crust if you prefer! I highly recommend making your own!
Apple Filling
- Apples – Peeled, cored and sliced ¼-inch thick. Granny Smith, Golden Delicious, or Ambrosia Apples are all acceptable options. See “FAQs & Expert Tips” for more info on the best baking apples.
- Butter – I always go with unsalted to control the sodium! Make sure it’s melted.
- Lemon Juice – I prefer freshly squeezed, use what you have!
- Sugar – We are using packed brown sugar, dark or light.
- Flour – I used trusty all-purpose flour because it works best!
- Cinnamon – Ground. If you want, you can go ahead and use my apple pie spice for more of a combination.
Topping
- Flour – I used all-purpose flour.
- Sugar – Back with the brown sugar again!
- Butter – For the topping, you want your butter to be cold and cubed.
- Salt – This is going to help balance out the sweetness! Don’t skip it.
How To Make Dutch Apple Pie
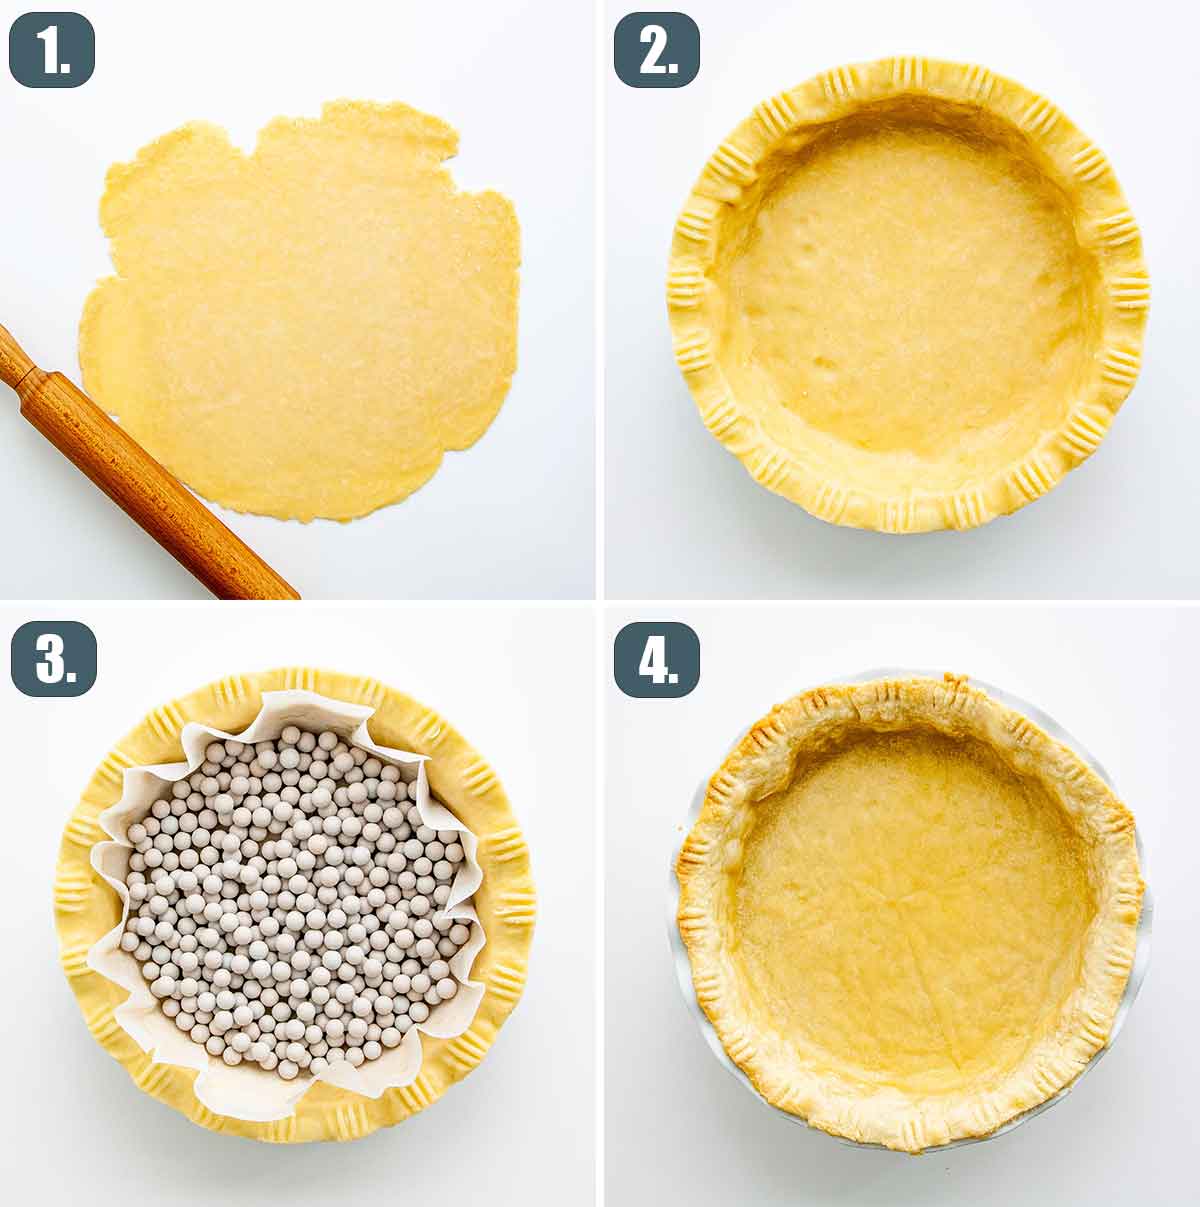
Prep Crust
- Preheat Oven: Preheat oven to 425°F. Adjust the oven rack to the lowest position.
- Roll Out Crust: Roll out the pie crust so that it’s 12-inches in diameter and place the pie dough lightly into a 9-inch pie plate. I usually roll it on the rolling pin and unroll it over the pie plate. Crimp the edge and cut off excess dough.
- Prep: Line the pie with parchment paper and fill the pie with weights. You can purchase pie weights or you can use beans or rice. However, make sure the weights cover the entire bottom of the pie. The weights will keep the pie from puffing up and the sides from sagging as the crust bakes.
- Bake: Bake for 12 to 15 minutes or until the edges are golden.
- Cool: Remove the pie weights by grabbing the corners of the parchment paper and lifting the weights out of the pie. Since the bottom of the crust will still be uncooked now, you need to return the pie crust to the oven and bake for an additional 5 minutes. Remove the crust from the oven and let cool on a wire rack while you prepare the topping and filling.
Finish
- Preheat Oven: Turn down the oven heat to 375°F.
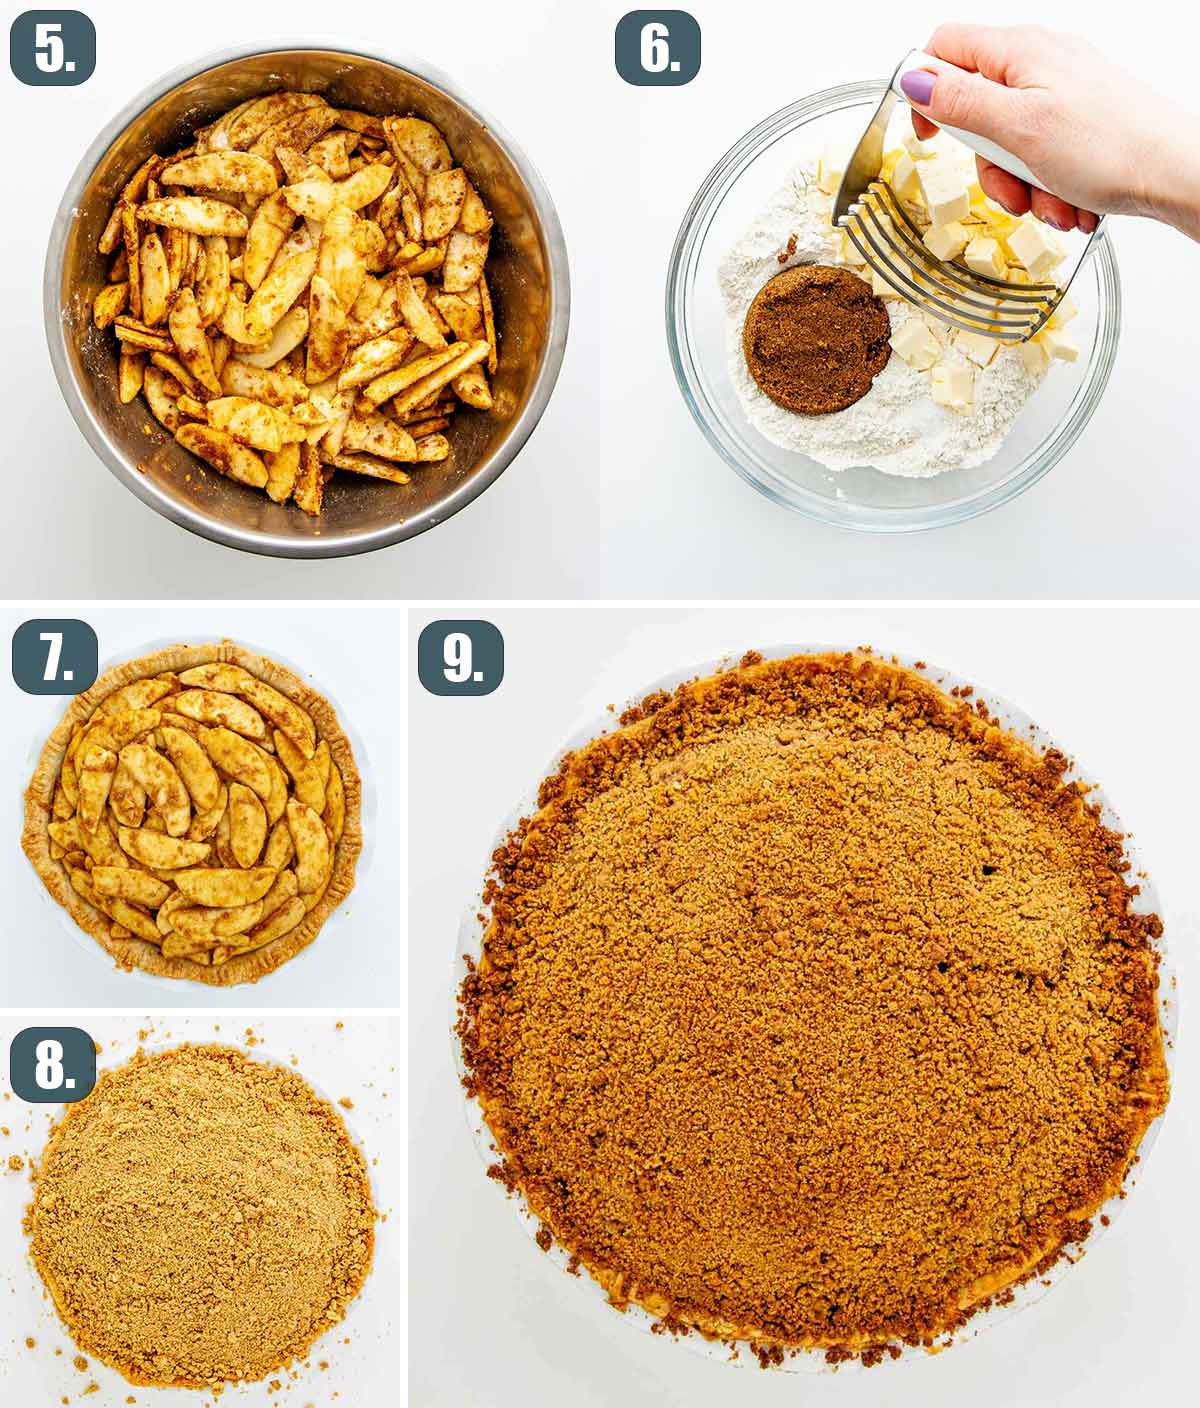
- Make Filling: Make the filling by combining the apples, butter, lemon juice, brown sugar, flour, and cinnamon in a large bowl. Stir to coat evenly. Set aside.
- Make Topping: Prepare the topping by combining the flour, brown sugar, and butter in a medium bowl. Using a pastry cutter or fork blend the mixture together until coarse crumbs form. Using your hands squeeze the mixture together until all the butter is absorbed and your crumb topping comes together.
- Assemble Pie: Spread the apple filling evenly into the crust, discarding any liquid that may have been released from the apples. Next, sprinkle the topping evenly over the apples.
- Bake: Place the apple pie on a rimmed baking sheet and transfer to the oven. Bake for 45 to 55 minutes or until apples are tender when poked with a fork or toothpick. Check the pie a couple times to make sure the topping is over-browning, if so, cover loosely with foil and continue baking. If you find the pie isn’t browning enough, remove the pie from the oven, move the rack back on the middle position and continue baking.
- Cool & Serve: Remove the pie form the oven and cool on a wire rack. Serve warm with a scoop of ice cream.
Frequently Asked Questions
Frequently Asked Questions
What Is A Dutch Apple Pie?
A Dutch apple pie starts with a traditional, flaky homemade pie crust, then is filled with a deliciously sweet and gooey apple pie filling, and finally finished off with a sweet and buttery streusel topping.
Dutch Apple Pie VS Traditional Apple Pie
While similar in comfort and taste, the main difference between a Dutch apple pie and a regular apple pie is the streusel topping! While traditional pies are topped with a pie crust, this dutch apple pie topping is more of a “streusel” consisting of butter, flour, and sugar baked on top for a sweet, crunchy twist. It’s easier to make than a pastry crust and adds something different to the traditional pie we all know and love!
What Are The Best Apples To Bake With?
Granny smith is hands down the best baking apple! It is sturdy enough to prevent a gooey mess when pulled from the oven, and it’s nice and tart – which means that it holds up well to all the sugar! You can always use golden delicious or ambrosia apples instead, but keep in mind that sugar levels may have to be adjusted.
Can I Make This In Advance?
Yes! You can make your dutch apple pie either a day in advance, or you can freeze it for a future treat! Scroll down to “freezing” section below for full instructions.
Tips
- For the very best pie result, I highly highly recommend a homemade crust. If you insist, a store-bought pie crust will work too.
- Make sure your apples are at room temperature before baking with them! If you’re one to keep apples in the fridge, be sure to remove them well ahead of time.
- Whether you want to keep the peel of the apple on or not is totally up to you. I like to remove it from my apples for both visual appeal and to assure that my texture is spot on.
- Be sure to cut your apples up thin enough to ensure they bake to tender perfection, we don’t want any hard or raw bits in our filling.
- In my opinion, it is essential to serve this Dutch apple pie with a scoop of vanilla ice cream! Without it, it would be like serving a peanut butter and jam sandwich – without the jam!
Storing
You want to make sure you pop this dish in the fridge once it’s cooled! The apples and the topping don’t last well at room temperature. Seal completely or store in an airtight container for 3 – 5 days.
Freezing
Allow your Dutch apple pie to cool completely before transferring to an airtight container and store in the freezer. Properly stored, it will keep for up to 3 months.
Allow to thaw overnight in the fridge before warming back up to serving temperature in the oven at 350 F degrees for 20 – 25 minutes.
More Delicious Recipes To Try
Dutch Apple Pie
Ingredients
- 1 pie crust Note: my recipe for pie crust makes 2 crusts
Apple Filling
- 8 medium apples peeled, cored and sliced ¼-inch thick, such as Granny Smith, Golden Delicious, or Ambrosia Apples
- 2 tablespoon butter unsalted, melted
- 1 tablespoon lemon juice freshly squeezed
- ½ cup brown sugar dark or light, packed
- ¼ cup all-purpose flour
- ½ teaspoon cinnamon ground
Topping
- 1 cup all-purpose flour
- ½ cup brown sugar light, packed
- ½ cup butter cold, cubed
- ¼ teaspoon salt
Instructions
- Preheat Oven: Preheat oven to 425°F. Adjust the oven rack to the lowest position.
- Roll Out Crust: Roll out the pie crust so that it's 12-inches in diameter and place the pie dough lightly into a 9-inch pie plate. I usually roll it on the rolling pin and unroll it over the pie plate. Crimp the edge and cut off excess dough.
- Prep: Line the pie with parchment paper and fill the pie with weights. You can purchase pie weights or you can use beans or rice. However, make sure the weights cover the entire bottom of the pie. The weights will keep the pie from puffing up and the sides from sagging as the crust bakes.
- Bake: Bake for 12 to 15 minutes or until the edges are golden.
- Cool: Remove the pie weights by grabbing the corners of the parchment paper and lifting the weights out of the pie. Since the bottom of the crust will still be uncooked now, you need to return the pie crust to the oven and bake for an additional 5 minutes. Remove the crust from the oven and let cool on a wire rack while you prepare the topping and filling.
- Preheat Oven: Turn down the oven heat to 375°F.
- Make Filling: Make the filling by combining the apples, butter, lemon juice, brown sugar, flour, and cinnamon in a large bowl. Stir to coat evenly. Set aside.
- Make Topping: Prepare the topping by combining the flour, brown sugar, and butter in a medium bowl. Using a pastry cutter or fork blend the mixture together until coarse crumbs form. Using your hands squeeze the mixture together until all the butter is absorbed and your crumb topping comes together.
- Assemble Pie: Spread the apple filling evenly into the crust, discarding any liquid that may have been released from the apples. Next, sprinkle the topping evenly over the apples.
- Bake: Place the apple pie on a rimmed baking sheet and transfer to the oven. Bake for 45 to 55 minutes or until apples are tender when poked with a fork or toothpick. Check the pie a couple times to make sure the topping is over-browning, if so, cover loosely with foil and continue baking. If you find the pie isn't browning enough, remove the pie from the oven, move the rack back on the middle position and continue baking.
- Cool & Serve: Remove the pie form the oven and cool on a wire rack. Serve warm with a scoop of ice cream.
Tips & Notes:
- For the very best pie result, I highly highly recommend a homemade crust. If you insist, a store-bought pie crust will work too.
- Make sure your apples are at room temperature before baking with them! If you’re one to keep apples in the fridge, be sure to remove them well ahead of time.
- Whether you want to keep the peel of the apple on or not is totally up to you. I like to remove it from my apples for both visual appeal and to assure that my texture is spot on.
- Be sure to cut your apples up thin enough to ensure they bake to tender perfection, we don’t want any hard or raw bits in our filling.
- In my opinion, it is essential to serve this Dutch apple pie with a scoop of vanilla ice cream! Without it, it would be like serving a peanut butter and jam sandwich – without the jam!
- You want to make sure you pop this dish in the fridge once it’s cooled! The apples and the topping don’t last well at room temperature. Seal completely or store in an airtight container for 3 – 5 days.
- Allow your Dutch apple pie to cool completely before transferring to an airtight container and store in the freezer. Properly stored, it will keep for up to 3 months.